How to replace a bathroom exhaust fan
SKILL LEVEL: INTERMEDIATE
With time, an old fan wears out; it's worth your while to replace it with a quieter, higher-capacity model. Learn how.

A bathroom vent fan not only removes moisture and unwanted odors but also cuts down on mold problems, eliminates window and door warping, and helps defog the mirror. With time, an old fan wears out; it is worth your while to replace it with a quieter, higher-capacity model.
Choose the lowest sone rating (0.5 is nearly silent, 4.0 is about as loud as a TV) you can afford. Before beginning, shut off the power at the electrical panel.
The connections on this job are simple; however, working overhead to remove the old unit is no fun. Be sure to wear workwear gloves, long sleeves, a cap, and respiratory and eye protection - falling insulation is inevitable.
What You’ll Need: Phillips screwdriver, pry bar, drill/driver and bits, mini hacksaw, utility knife, cutting/stripping pliers, new vent fan, cable clamp, duct tape, wire nuts
Quick Tip
Go up in the attic and make sure the duct vents air outdoors, not into the attic itself — a situation that can cause a world of mold.
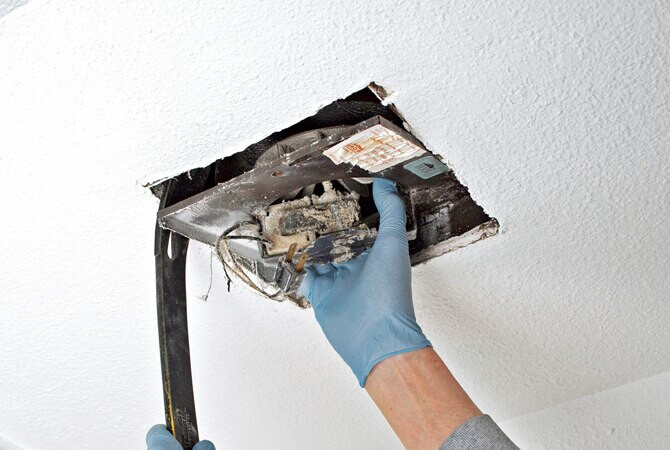
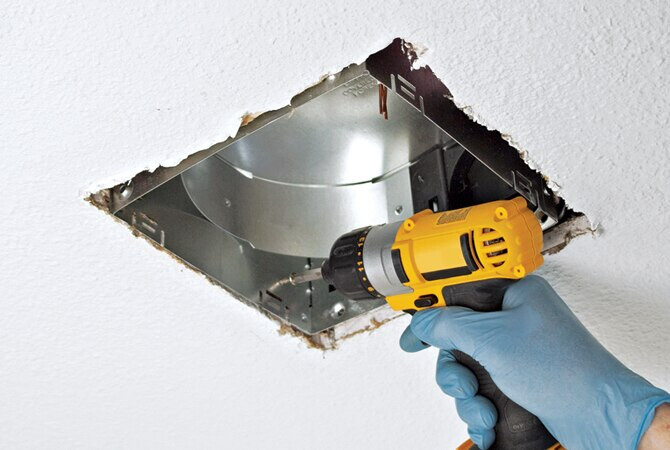
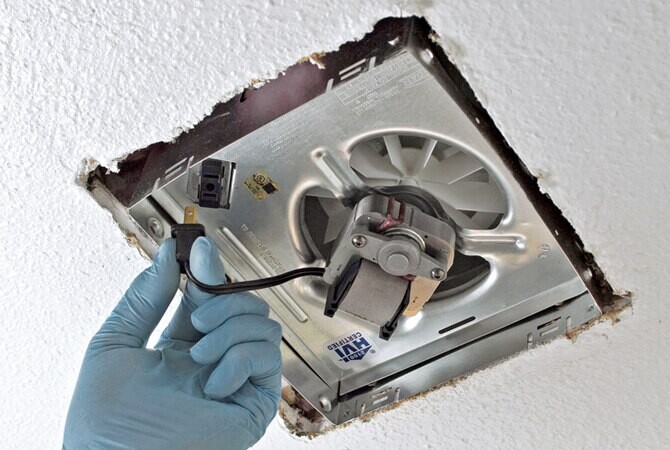
Step 1: Remove The Fan Mechanism
Shut off power at the electrical panel. (Use a voltage tester to confirm that the power is off.) Remove the grill. Unplug the cord from the receptacle in the housing. Unfasten any retaining screws, and use a pry bar to pry out the fan mechanism from the housing.
Step 2: Disconnect The Wires
Open the receptacle cover in the housing and pull out the wires. Disconnect the wires inside the housing receptacle by turning the wire nuts counterclockwise.

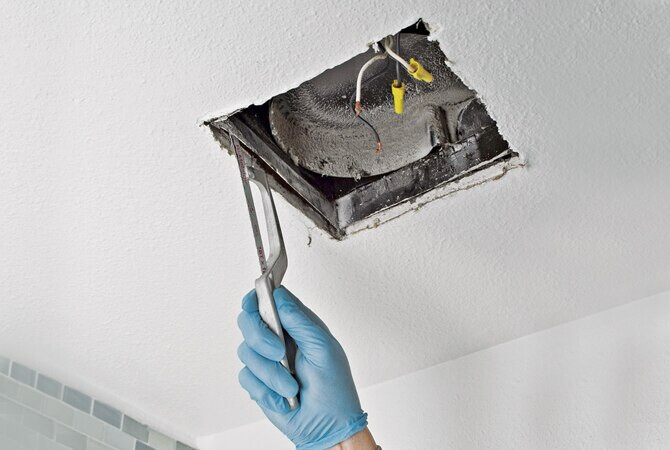
Step 3: Release The Housing
Look for any fasteners and back them out. If you can find no fasteners inside the housing, it was likely attached from above. Typically, nails or screws will be on one side only. Use a mini hacksaw to cut through them.
Step 4: Detach The Wires And Vent Tube
Lower the housing, guiding the wires out of the receptacle as you do. Be prepared for a cascade of insulation. Cut the wires or release them from the cable clamp. Use a utility knife to cut and remove the duct tape or clamp holding the vent duct to the housing.

Step 5: Strip The Wire
Use the stripping pliers to strip off about 4 in. of cable insulation. Straighten the wires and strip about 1⁄2 in. of insulation from the wire ends. Avoid nicking the wires as you do so.

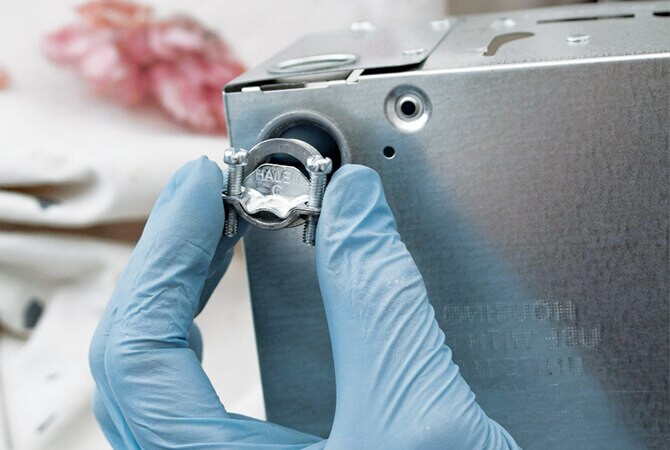
Step 6: Attach A Cable Clamp
Insert a cable clamp into the opening provided for it in the housing. From inside the box, screw the lock ring on the clamp and tighten.
Step 7: Insert The Wire Into The Clamp
Use a Phillips screwdriver to loosen the retaining screws on the cable clamp. Push the wires through the clamp and into the box. Push about 6 in. of cable into the box and tighten the clamp.
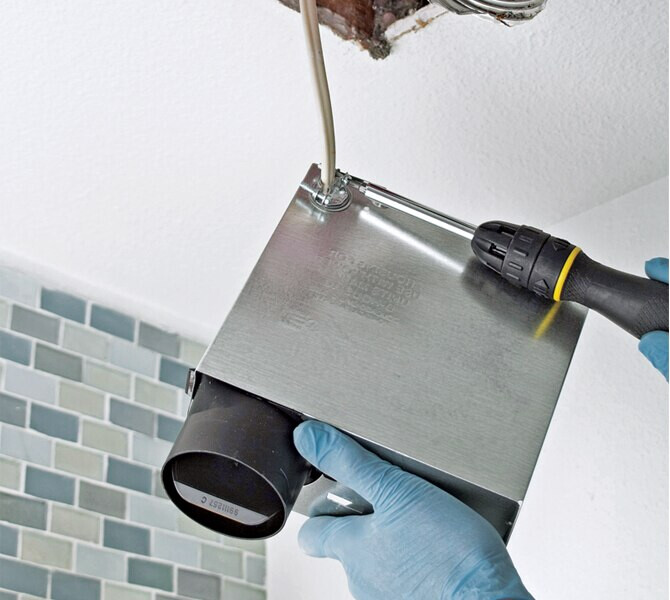
Step 8: Attach The Vent Duct To The New Housing
Using duct tape or a hose clamp, attach the vent duct to the new fan housing. Pull on the duct to test that it is securely fastened.

Step 9: Insert The New Housing
Guiding the wires and duct, push the housing into the ceiling. Check that the edge of the housing is even with the ceiling surface. Attach it to the nearest joist using general-purpose screws.
Quick Tip
Filling the gap between the fan housing and the ceiling with spray foam insulation limits air leakage and reduces fan noise.
Step 10: Connect The Wires
Beginning with the uninsulated or green insulated copper grounds, hold the stripped ends of the wires side by side and twist on a wire nut, turning it clockwise. Connect the white wire to the white wire, black to black. Clip on the receptacle cover.

Step 11: Insert The Fan Mechanism
Note the opening for the receptacle, and line it up with the appropriate corner of the receptacle box. Push the fan mechanism up into the housing until it clips in place. Some units may also have a retaining screw.

Step 12: Plug It In
Insert the fan plug into the receptacle. If you can access the fan housing from the attic, replace any insulation you may have moved during installation. Check that the duct is attached to its roof vent.
Step 13: Install The Grill
Most grills attach with simple springs that fit in grooves on opposite sides of the housing. The grills are wide enough to cover the opening in the ceiling. Restore power and test.
Recommended Tools For This Project


article disclosure
To reduce the risk of personal injury and property damage, read and follow all related product manufacturers instruction manuals and information before performing any of the applications shown. Some construction-related applications shown may not be allowed in your local area. Consult your local authority having jurisdiction (AHJ) before starting work for information on permits, applicable codes, and other regulations. STANLEY disclaims any responsibility for any damage to property or injury to persons as a result of misuse of the information provided.
