How to replace a ceiling light fixture in 8 simple steps
SKILL LEVEL: INTERMEDIATE
Replacing a light fixture is one of the most satisfying electrical upgrades and a great way to quickly transform a room. Learn how you can make this home upgrade in 8 simple steps.

Replacing a light fixture is one of the most satisfying electrical upgrades and a great way to quickly transform a room. Choose a fixture suitable for the amount of light you need. Never boost the illumination by installing bulbs of a greater wattage than the fixture is rated for.
As with any electrical upgrade, shut off the power before beginning and use a circuit tester to confirm the power is off.
What You’ll Need: Circuit tester, small slot or Phillips screwdriver, wire stripper, new light fixture, wire nuts, electrical tape
Step 1: Remove The Old Fixture
Confirm that the power is off by turning the wall switch off and on. The fixture should not light up. Remove the bulb(s) and detach the old fixture from the box. The type shown attaches with a nut and threaded post.

Step 2: Detach The Wires
Use a bent piece of coat hanger to hang the fixture from the box in order to support it. Unscrew the wire nuts and detach the wire connections.

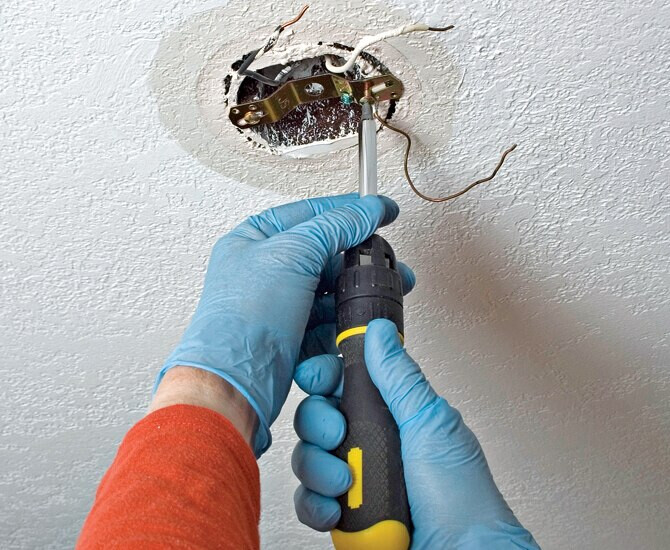
Step 3: Detach The Strap
Use a screwdriver to remove the old strap from the box.
Step 4: Strip The Wires
With diagonal cutting pliers, nip off the bit of bare wire used for the connection. Strip off 3/4 in. of insulation. Then install the new strap that comes with the replacement fixture.

Step 5: Connect With Wire Nuts
To avoid straining the connections, temporarily hang the new fixture from the box with the bent coat hanger. Beginning with the uninsulated or green insulated copper grounds, hold the stripped ends side by side and twist on a wire nut, turning it clockwise. Connect the white wire to the white wire and the black to the black.

Step 6: Secure The Connections
Wire nuts twist the wires around each other while securing them. Give each wire nut a pull to confirm that the connection is tight. Wrap a couple of inches of electrical tape around the wire and nut to secure the connection.

Step 7: Install The Fixture
This fixture uses screws for mounting to the box. Some use a threaded post as shown in Step 1. Start the mounting screws in the strap, position the fixture, and tighten the mounting screws with a screwdriver.

Step 8: Install The Bulbs And Globe
Check the fixture base to determine the maximum wattage bulb that can be installed. After screwing in the proper bulb, restore power and test.
Recommended Tools For This Project


article disclosure
To reduce the risk of personal injury and property damage, read and follow all related product manufacturers instruction manuals and information before performing any of the applications shown. Some construction-related applications shown may not be allowed in your local area. Consult your local authority having jurisdiction (AHJ) before starting work for information on permits, applicable codes, and other regulations. STANLEY disclaims any responsibility for any damage to property or injury to persons as a result of misuse of the information provided.
